Making your own body butter gives you complete control over ingredients. Mature skin has unique needs that store-bought products don’t always address. However, homemade body butter can target specific concerns like dryness, loss of elasticity, and fine lines. This guide shows you how to create luxurious body butter perfectly suited for aging skin.
Understanding Mature Skin Needs
Mature skin undergoes significant changes over time. The skin produces less natural oil as we age. Additionally, collagen production decreases, leading to thinner, more delicate skin. These changes make mature skin more prone to dryness and sensitivity.
According to Harvard Health, aging skin requires extra moisture and protection. Mature skin also heals more slowly and bruises more easily. Therefore, choosing gentle, nourishing ingredients becomes essential for proper skin care.
Body butter provides intense hydration that penetrates deeply. Unlike regular lotions, body butter contains concentrated oils and butters. This richness helps restore moisture that aging skin desperately needs.
Benefits of Homemade Body Butter
Creating your own body butter offers numerous advantages. First, you control every ingredient that touches your skin. This matters because mature skin often becomes more sensitive to chemicals and fragrances.
Store-bought products frequently contain preservatives, synthetic fragrances, and fillers. These additives can irritate aging skin. Conversely, homemade body butter uses pure, natural ingredients that nourish without harsh chemicals.
Furthermore, making body butter at home saves money over time. Premium anti-aging products can cost significant amounts. Your homemade version provides similar benefits at a fraction of the price. Additionally, you can customize the recipe to address your specific skin concerns.
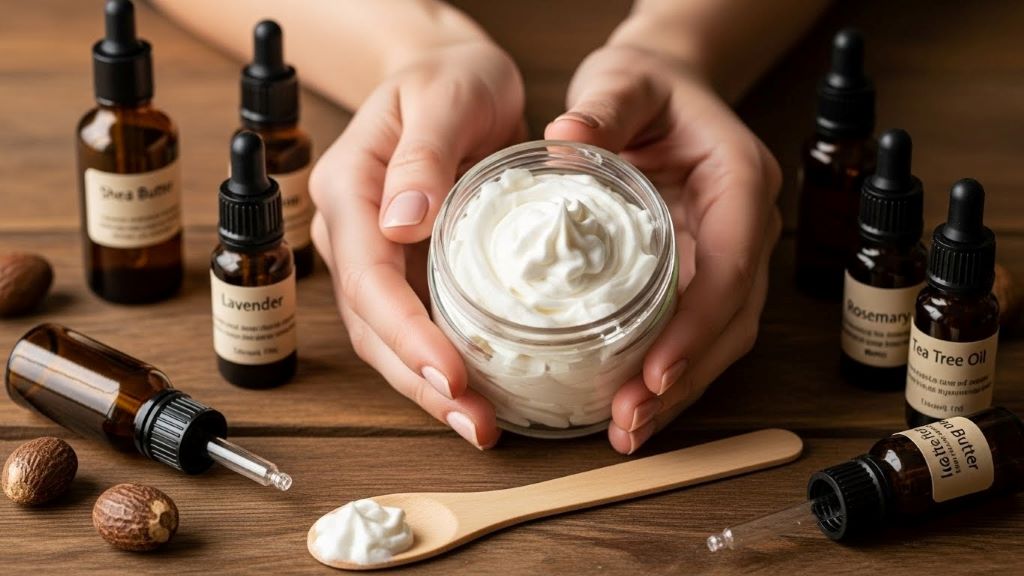
Essential Ingredients for Aging Skin
The foundation of excellent body butter starts with the right ingredients. Each component serves a specific purpose for mature skin health.
Shea butter forms the base of most body butter recipes. This natural fat comes from the nuts of shea trees. Shea butter contains vitamins A and E, which support skin repair. Moreover, it provides deep moisturization without feeling greasy.
Cocoa butter adds firmness and helps improve skin elasticity. Rich in antioxidants, cocoa butter protects against environmental damage. It also has a natural pleasant scent that many people enjoy.
Coconut oil absorbs quickly and delivers fatty acids that nourish aging skin. However, some people find coconut oil comedogenic. Therefore, you can substitute jojoba oil or sweet almond oil if preferred.
Vitamin E oil acts as a powerful antioxidant. It fights free radicals that accelerate aging. Additionally, vitamin E extends the shelf life of your homemade body butter naturally.
Essential oils provide therapeutic benefits beyond fragrance. Frankincense oil promotes cell regeneration and reduces the appearance of age spots. Lavender oil soothes skin and helps with inflammation. Rosehip seed oil contains retinol naturally, which supports collagen production.
Tools and Equipment Needed
Gathering proper tools ensures a smooth preparation process. You need a double boiler or heat-safe bowl over a pot. This setup melts ingredients gently without burning them.
A hand mixer or stand mixer whips the body butter to a light, fluffy consistency. Mixing by hand works but requires considerable effort. Therefore, an electric mixer saves time and creates better texture.
Clean glass jars with tight-fitting lids store your finished product. Mason jars work perfectly for this purpose. Choose jars that hold four to eight ounces for convenient use.
Measuring cups and spoons ensure accurate proportions. Precision matters when creating skincare products. Finally, keep clean spatulas handy for transferring the finished body butter into containers.
Basic Body Butter Recipe for Mature Skin
This recipe creates approximately 16 ounces of luxurious body butter. The ingredients work together to address multiple aging skin concerns.
You will need half a cup of shea butter, one-quarter cup of cocoa butter, one-quarter cup of coconut oil, two tablespoons of sweet almond oil, one teaspoon of vitamin E oil, and 15 to 20 drops of essential oils of your choice.
These measurements create a rich, nourishing formula. However, you can adjust proportions slightly based on your preferences. Some people prefer more shea butter for extra moisture, while others add more coconut oil for faster absorption.
Step-by-Step Preparation Instructions
Start by setting up your double boiler. Fill the bottom pot with two inches of water and place it on medium heat. Put your heat-safe bowl on top, ensuring it doesn’t touch the water directly.
Add the shea butter and cocoa butter to the bowl. Stir occasionally as they melt together. This process takes approximately five to ten minutes. Meanwhile, the gentle heat preserves the beneficial properties of these ingredients.
Once the butters melt completely, remove the bowl from heat. Add the coconut oil and sweet almond oil. Stir until everything combines into a smooth liquid. The residual heat will melt the coconut oil easily.
Let the mixture cool at room temperature for about 30 minutes. You want it to begin solidifying but remain soft. Alternatively, place the bowl in the refrigerator for 15 to 20 minutes. Watch it carefully to prevent it from becoming too hard.
When the mixture reaches a soft, semi-solid consistency, add vitamin E oil and essential oils. Then, use your mixer on medium speed. Beat the mixture for five to ten minutes. The body butter will transform from yellow liquid to white, fluffy cream.
Scrape down the sides of the bowl occasionally during mixing. This ensures even incorporation of all ingredients. The final texture should resemble whipped frosting.
Transfer the whipped body butter into clean jars using a spatula. Fill jars to about three-quarters full, leaving room at the top. Seal the containers tightly to maintain freshness.
Customizing Your Body Butter Recipe
Personalizing your body butter addresses specific aging skin concerns. Each modification targets different needs that mature skin experiences.
For age spots and hyperpigmentation, add one tablespoon of rosehip seed oil. This oil contains natural vitamin A that brightens skin tone. Additionally, include ten drops of carrot seed essential oil, which supports skin regeneration.
Extra dry skin benefits from increased shea butter content. Use three-quarters cup of shea butter instead of half a cup. Furthermore, substitute argan oil for coconut oil, as argan oil provides exceptional moisture retention.
Sensitive aging skin requires gentle ingredients without strong scents. Eliminate essential oils entirely or use only five drops of lavender. Additionally, choose unrefined shea butter carefully, as some people react to its natural scent.
According to WebMD, ingredients like ceramides and hyaluronic acid benefit aging skin. While these ingredients work better in water-based products, focusing on rich oils and butters in your body butter provides complementary benefits.
Firming and toning mature skin responds well to coffee-infused oil. Steep two tablespoons of ground coffee in your sweet almond oil for two weeks before making your body butter. Strain the oil thoroughly before use. Coffee contains antioxidants that temporarily tighten and smooth skin appearance.
Application Tips for Maximum Benefits
Proper application ensures you receive full benefits from your body butter. Timing and technique both matter for optimal results.
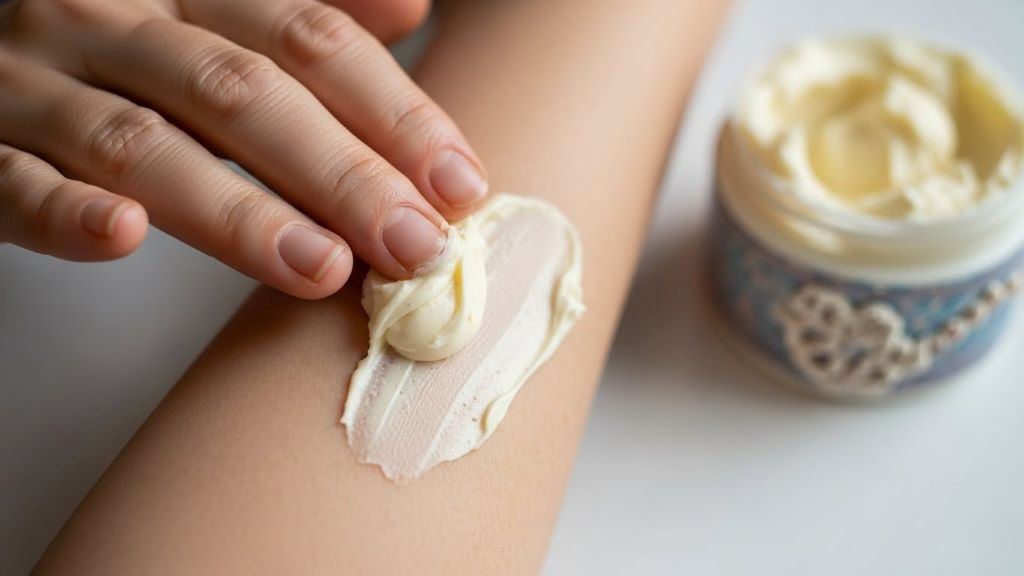
Apply body butter immediately after bathing or showering. Your skin is still slightly damp, which helps seal in moisture. Pat your skin gently with a towel rather than rubbing it completely dry. Then, apply body butter while your skin remains warm and receptive.
Use a small amount and warm it between your palms first. This softens the butter and makes it spread more easily. Massage it into your skin using circular motions. Pay special attention to areas prone to dryness like elbows, knees, and hands.
For mature skin on the neck and chest, apply body butter using upward strokes. This area shows aging signs prominently and benefits from regular moisturization. However, avoid applying body butter to your face unless specifically formulated for facial use.
Allow a few minutes for complete absorption before dressing. Body butter is rich and needs time to penetrate fully. Meanwhile, you can perform other parts of your routine.
Apply body butter at least once daily, preferably twice for very dry mature skin. Consistency produces the best results over time. Therefore, make it part of your regular self-care routine.
Storage and Shelf Life
Proper storage extends the life of your homemade body butter. Natural products require more care than commercial alternatives with synthetic preservatives.
Store body butter in a cool, dry place away from direct sunlight. Heat can cause the butter to melt and separate. Additionally, exposure to light degrades vitamin E and other beneficial compounds.
The refrigerator works well during hot summer months. However, refrigeration makes the butter very firm. Remove it 15 minutes before use to soften naturally. Alternatively, keep a small amount in a separate container at room temperature for daily use.
Homemade body butter typically lasts three to six months. The vitamin E oil acts as a natural preservative. Nevertheless, always check for changes in smell, color, or texture. If you notice any rancid odor or mold, discard the product immediately.
Use clean hands or a small spatula when removing body butter from the jar. This prevents introducing bacteria that could spoil the product. Never dip wet fingers into the jar.
Troubleshooting Common Issues
Sometimes body butter doesn’t turn out as expected. Understanding common problems helps you fix them quickly.
Grainy texture occurs when body butter melts and resolidifies unevenly. If this happens, remelt the butter completely and whip it again. This time, cool it more slowly at room temperature. Additionally, avoid temperature fluctuations during storage.
Too soft or runny body butter means it contains too much liquid oil. Next time, reduce the coconut oil or other liquid oils by one tablespoon. Conversely, increase the shea butter or cocoa butter slightly for a firmer consistency.
Body butter that won’t whip properly might be too warm or too cold. The ideal temperature for whipping feels cool but soft to the touch. If too warm, refrigerate briefly. If too hard, let it warm up slightly.
Separation can occur if ingredients aren’t properly emulsified. Thorough mixing prevents this issue. If separation happens, remix the body butter until it comes back together.
Safety Considerations and Patch Testing
Even natural ingredients can cause reactions in some people. Mature skin often becomes more sensitive, making patch testing essential.
Before using your new body butter extensively, perform a patch test. Apply a small amount to the inside of your wrist or elbow. Wait 24 hours and watch for redness, itching, or irritation. If any reaction occurs, identify and eliminate the problematic ingredient.
Some essential oils cause photosensitivity. Citrus oils particularly increase sun sensitivity. Therefore, use them cautiously and always apply sunscreen when going outdoors. Alternatively, reserve citrus-scented body butter for evening use only.
Pregnant women should consult healthcare providers before using certain essential oils. Some oils are not recommended during pregnancy. Similarly, people with specific health conditions should verify ingredient safety with their doctors.
Always purchase high-quality, pure ingredients from reputable suppliers. Cheap oils and butters may contain contaminants or additives. Quality ingredients ensure both safety and effectiveness.
Conclusion
Making body butter for mature aging skin combines simple techniques with powerful natural ingredients. This homemade solution addresses the unique needs of aging skin through deep moisturization and nourishment. By following this guide, you can create luxurious body butter customized to your preferences and skin concerns. The process requires minimal equipment and basic ingredients that work together to support healthy, hydrated mature skin. Regular use of your homemade body butter helps combat dryness, improves skin texture, and provides the intensive care that aging skin deserves. Start with the basic recipe, then experiment with modifications until you discover your perfect formula.
Frequently Asked Questions
How long does homemade body butter last?
Homemade body butter typically lasts three to six months when stored properly. Keep it in a cool, dark place away from heat and sunlight. The vitamin E oil acts as a natural preservative. Always check for changes in smell or appearance before use.
Can I use body butter on my face if I have mature skin?
Body butter is generally too heavy for facial skin. The rich oils can clog pores and cause breakouts, even on mature skin. Instead, create a lighter face cream using similar ingredients in different proportions. Use body butter on your neck and chest area.
What essential oils work best for aging skin?
Frankincense, lavender, and geranium essential oils benefit aging skin. Frankincense promotes cell regeneration and reduces age spots. Lavender soothes inflammation and supports healing. Geranium balances oil production and improves skin elasticity. Use 15 to 20 drops total per batch.
Why did my body butter become grainy?
Graininess occurs when shea butter melts and resolidifies unevenly. Temperature fluctuations during cooling cause this texture. To fix it, remelt the entire batch and whip again. Cool it slowly at room temperature without refrigeration. Store it in a stable temperature environment.
Can I make body butter without coconut oil?
Yes, you can substitute other oils for coconut oil. Jojoba oil, sweet almond oil, or argan oil work well. These alternatives provide similar benefits without coconut oil. Adjust quantities as needed since different oils have varying consistencies. Some people prefer alternatives if coconut oil causes breakouts.
Related Topics: