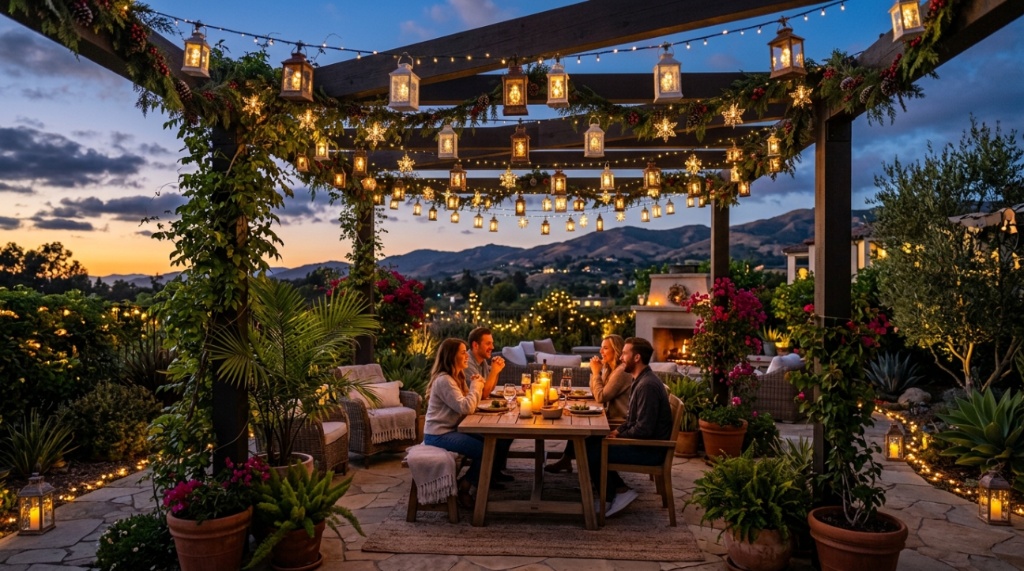
Picture this: it’s December in San Diego, and the sun is still blazing at 4:30 PM. You want that cozy, festive glow for your porch or backyard, but you also know that California sunshine is a resource you shouldn’t waste. That’s where solar-powered decor comes in, but not all lanterns are created equal for the Golden State’s unique climate. Whether you’re dealing with coastal fog in Monterey, desert chill in Palm Springs, or urban shade in Los Angeles, picking the right solar lights takes a bit more thought than just grabbing the first box off the shelf. This guide breaks down exactly what to look for, what to avoid, and how to get the most out of your outdoor holiday display, so your home looks merry and bright without spiking your electricity bill.
Key Takeaways
- Battery capacity and panel efficiency matter more than bulb count—California’s varied microclimates demand solar panels that can charge even in marine-layer fog or partial shade.
- Weather resistance is non-negotiable—look for IP65 ratings or higher to handle rain, coastal salt air, and temperature swings.
- Warm white LED light (2700K–3000K) replicates traditional holiday lanterns best and avoids the harsh, cold glow that cheap solar lights often produce.
- Consider the “dusk-to-dawn” sensor vs. motion sensor trade-off—depending on your neighborhood, one will serve you far better than the other.
- Maintenance is simple but essential—a quick monthly wipe of the solar panel can double your lantern’s nightly runtime in dusty or pollen-heavy areas.
Understand Your California Microclimate First
Before you even start shopping for California solar Christmas lanterns, you need to take an honest look at where you live. California isn’t one climate—it’s a patchwork of coastal, valley, desert, and mountain zones, and each one affects how solar technology performs.
In coastal regions like San Francisco, Santa Cruz, or Ventura, the infamous marine layer can roll in during the late afternoon and linger into the morning. This significantly reduces the “peak sun hours” your panel receives. Peak sun hours are the hours when solar irradiance averages 1,000 watts per square meter—essentially, the sunlight intensity needed to fully charge a battery. In coastal California, you might get only 3.5 to 4.5 peak sun hours in December, compared to 5.5 or more in inland areas.
In the Central Valley (Sacramento, Fresno, Bakersfield), fog is less of an issue, but winter can bring dense Tule fog that sits for days. Meanwhile, Southern California deserts get abundant sun but experience dramatic temperature drops at night, which can sap battery efficiency.
Practical tip: If you live in a foggy or overcast area, prioritize lanterns with monocrystalline silicon panels (more efficient in low light) rather than polycrystalline panels. A monocrystalline panel can still generate a trickle charge under diffuse cloud cover, which is often enough to keep lights running for a few extra hours.
The Battery Chemistry Distinction
Most solar lanterns use either NiMH (Nickel-Metal Hydride) or Lithium-ion (Li-ion) batteries. NiMH batteries are common and inexpensive, but they degrade faster in high heat. If you live in the Inland Empire or the Central Valley where summer temperatures routinely top 100°F, that cheap NiMH battery might not survive a full season, let alone multiple years. Li-ion batteries handle heat better and hold a charge longer, but they cost more. Read the spec sheet carefully—if the product page doesn’t list the battery type, that’s usually a red flag that it’s using the cheaper option.
Battery Capacity and Run Time: What the Specs Really Mean
You’ll see terms like “2000mAh” or “up to 8 hours runtime” on product listings, but understanding what these figures translate to in the real world is critical. The mAh (milliamp-hour) rating tells you the battery’s total energy storage capacity—not how long the light will stay on. That depends on the LED power draw.
A lantern with a 1200mAh battery and 20 LEDs drawing 0.05W each will run maybe 6–8 hours on a full charge. But a “deluxe” lantern with 50 LEDs pulling more current might drain that same battery in 3 hours. Here’s the catch: in California’s winter, you might only get 4 hours of usable sunlight to charge the battery fully. If the battery requires 8 hours of full sun to reach 100%, you will never see the advertised runtime.
What to look for: Find lanterns with a separate solar panel charging specification. A good rule of thumb is to look for a 5V/400mA panel output or higher. This indicates the panel can push enough current to refill the battery in roughly 4–6 hours of average winter sun. Also, check if the battery is replaceable—this is a huge advantage because you can swap out a tired battery after two years instead of tossing the whole lantern, If you are planning your holiday budget alongside outdoor lighting, learn more about market costs with this guide: What Determines Christmas Tree Prices?
How Many Lumens Do You Actually Need?
Lumens measure brightness, and for holiday ambience, you don’t need a floodlight. A typical decorative lantern produces 10 to 50 lumens. For reference, a standard 60W incandescent bulb produces about 800 lumens—you don’t want that for a lantern. For a pathway or porch glow, 15–30 lumens is sufficient. If you’re hanging lanterns higher up, say on a pergola or tree branch, you’ll want 40–60 lumens to make an impact from a distance.
However, high-lumen output means higher battery drain. A 50-lumen lantern will halve its runtime compared to a 25-lumen model with the same battery capacity. Decide what matters more: a bright glow for 4 hours or a subtle glow for 8 hours. For most holiday displays, the subtle glow wins because it’s more atmospheric anyway.
Weather Resistance and Build Quality for Coastal and Desert Climates
You might think all outdoor solar lights are waterproof. They’re not. The Ingress Protection (IP) rating is your best friend here. An IP65 rating means the lantern is fully protected against dust and can withstand low-pressure water jets from any direction. IP67 means it can survive temporary submersion in water. For California, IP65 is the minimum you should accept. Anything lower, and coastal fog or winter rain will eventually seep into the electronics.
But there’s another enemy you might not have considered: salt air. If you live within a few miles of the Pacific Ocean, the salt-laden breeze will corrode cheap metal fittings and plastic clips within a year. Look for lanterns made from powder-coated aluminum or high-grade ABS plastic. Avoid anything with exposed steel screws or hinges, especially in coastal cities like Santa Barbara, La Jolla, or Newport Beach.
Desert dwellers face a different problem: UV degradation. The intense high-desert sun (think Palm Springs, Joshua Tree, or Ridgecrest) will fade and embrittle cheap plastic lenses and housings. Check the product description for “UV-stabilized” or “UV-resistant” materials. Polycarbonate lenses are far more UV-resistant than standard acrylic, so that’s a worthwhile keyword to search for.
Heat and Cold Considerations
Batteries don’t like extremes. In the desert, a lantern left in direct sun can reach internal temperatures over 140°F in a sealed glass enclosure—this will permanently damage Li-ion batteries. In the mountains (Lake Tahoe, Big Bear), sub-freezing nights cause Li-ion batteries to lose temporary capacity, meaning the light dims significantly after midnight. NiMH batteries actually perform better in cold temperatures, which is a counterintuitive detail many shoppers miss. If your winter nights regularly dip below freezing, consider NiMH as a deliberate choice.
Sensor Technology: Automatic vs. Motion-Activated
The biggest frustration I hear about solar lawn lights and lanterns is, “They turn off randomly in the middle of the night” or “They stay on all day.” This comes down to the sensor technology being used.
Most lanterns use a simple photocell sensor (a light-dependent resistor). When ambient light drops below a threshold, the lantern turns on. The problem? A porch light, streetlamp, or even a bright moon can confuse the sensor, causing flickering or premature shutdown. More importantly, in California’s dense fog, the sensor might think it’s night at 3 PM and turn on early—draining the battery before true darkness even begins.
Look for lanterns with a photocell delay mechanism. Some premium models have a built-in microprocessor that checks light levels multiple times over several minutes before switching on, preventing those false triggers. This feature is often described as “smart dusk-to-dawn detection” or “delayed light response” in the specifications.
Motion-activated lanterns are a different beast. They stay off until an infrared sensor detects movement, then switch on at full brightness for 20–30 seconds. These are excellent for security-minded homeowners who want a lantern look without committing to an all-night glow. But for holiday decor, they’re often a letdown—guests walk past, the lantern blinks on for 30 seconds, then goes dark. If you want a festive atmosphere, stick with dusk-to-dawn sensors for your primarily decorative lanterns and reserve motion-sensor options for side yards or entrances.
Comparing Popular Solar Lantern Styles for the Holidays
Not all solar lanterns look like traditional Christmas decor. Choosing the right style is as much about your home’s architecture as it is about function.
Pathway Stake Lanterns: These are mounted on a stake and are perfect for lining a driveway or walkway. They typically have a small footprint and a lower light output (10–20 lumens). Their advantage is directionality—they cast light downward, illuminating the ground without blinding anyone.
Hanging Lanterns: These come with a metal hook or ring and can be hung from porch overhangs, tree branches, or pergolas. They produce a 360-degree glow, which is ideal for creating a warm, inviting atmosphere. The downside? Swinging in the wind can crack the solar panel if the housing is flimsy. Look for a secure swivel hook and a reinforced mounting point.
Post-Top Lanterns: Designed to sit on fence posts or deck balusters, these are more substantial and often have larger panels. They can produce 50+ lumens and are a good choice for permanent outdoor lighting that just happens to be decorative during the holidays. They’re heavier and harder to remove, so they’re a bigger commitment.
| Style | Best For | Typical Lumens | Mounting | Key Limitation |
|---|---|---|---|---|
| Pathway Stake | Driveways, walkways | 10–20 | Ground stake | Low light output; can be knocked over |
| Hanging | Porches, trees, pergolas | 15–40 | Hook, ring, or zip tie | Wind sway can damage panel |
| Post-Top | Fence posts, deck rails | 30–60 | Bolt or flange | Harder to relocate; heavier |
Design and Materials That Complement Your Home
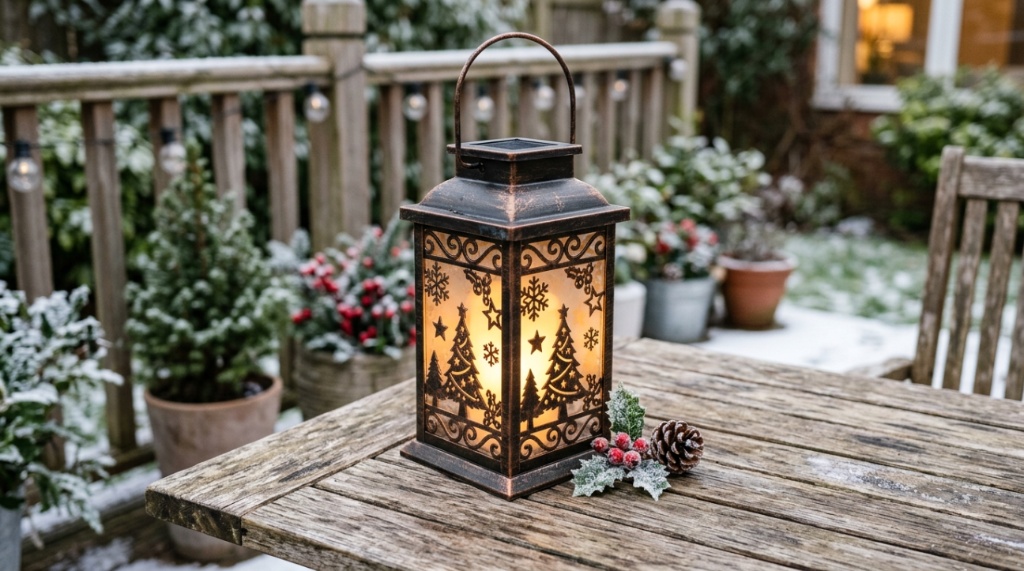
Your lantern shouldn’t look like a science project strapped to a solar panel. The aesthetic quality of solar lanterns has improved dramatically in recent years, moving away from that plastic, toy-like appearance toward brushed metal finishes and real glass.
Black or dark bronze finishes tend to blend seamlessly with most home exteriors. White or cream finishes look charming on craftsman or farmhouse-style homes. Avoid bright metallic silver or chrome—it reflects light and draws attention to the technology rather than the glow. Also, check if the “glass” is actual glass or acrylic. Acrylic is lighter and safer, but real glass gives a far richer light diffusion and won’t yellow over time. If you’re in a high-wind area, acrylic might be the safer choice—flying debris can shatter glass panels.
Installation Tips: Getting the Most Out of Your Solar Panels
You can buy the priciest lantern on the market, but if you install it in the wrong spot, it will perform like a $10 Walmart special. Placement is about finding the sweet spot between optimal sun exposure and aesthetic placement.
First, understand that solar panels need direct sunlight, not just daylight. Shade cast by a porch roof, a large tree, or even a neighbor’s two-story house can reduce energy capture by more than 50%.
For hanging lanterns, angle the solar panel toward the southern sky (if you’re in the Northern Hemisphere—and in California, you always are). Even a 10–15 degree tilt toward the south can significantly improve winter performance, because the sun sits lower on the horizon in December. Many lanterns have fixed panels, but some allow you to tilt or detach the panel and place it separately—this is a game-changer if your porch gets no direct sun but your lawn does.
A Step-by-Step Installation Checklist
- Identify the panel orientation: Determine where the solar panel is located on the lantern. If it’s on top and the lantern hangs vertically, it’ll only catch direct sun at midday. Consider placing it somewhere with open sky exposure.
- Test before you finalize: Turn the lantern on and place it in the intended location for a full day. If it doesn’t stay lit for at least 5 hours on the first night, relocate it before you commit to permanent mounting.
- Use the “ON” switch correctly: Many lanterns have an “ON” switch that bypasses the sensor for continuous operation, and an “ON/AUTO” switch. If you use the plain “ON,” the lantern might turn on during the day. Set it to AUTO only if the sensor works well in your environment.
- Tighten all seals: Before hanging or staking, check that all rubber gaskets around the battery compartment are seated correctly. A single rainstorm with a poor seal will kill the electronics instantly.
Common Mistakes and How to Avoid Them
One common mistake is throwing away the instruction manual. The manual often contains specifics about battery orientation, switch modes, and cleaning instructions that aren’t obvious from the physical design. I’ve seen more than one lantern rendered useless because the plastic pull-tab between the battery and the contact was left in place.
Another frequent error is not turning the lantern to “OFF” during shipping or initial setup. During the box’s journey from warehouse to your door, the lantern may have triggered its photocell and drained the battery. When you unbox it at 5 PM, the battery is already dead. Charge it for 24 hours in direct sunlight with the switch in the “OFF” position before your first full night of use—this ensures the battery gets a healthy initial charge.
Finally, realize that solar lanterns aren’t set-and-forget devices. Trees grow, seasons change, and falling leaves can blanket a panel in November. A simple weekly inspection during December is worth the effort. Clean the panel with a damp cloth (never abrasive cleaners) and clear any debris. This single habit will extend your lantern’s usable life by years and keep your display bright all season long.
Frequently Asked Questions
Do solar lanterns need direct sunlight to charge?
They need direct sunlight for maximum charging, but they can still gather some charge under diffuse cloud cover. If you live in a shady area, expect reduced runtime. Monocrystalline panels are slightly better at low-light charging than polycrystalline ones.
Can I leave solar Christmas lanterns outside all year in California?
Yes, provided they have an IP65 rating or higher and are made from weather-resistant materials like powder-coated aluminum or UV-stabilized plastic. However, coastal salt air and desert UV will age them faster; inspecting seals and cleaning panels monthly helps mitigate this.
Why did my lantern stop working after three months?
Most often, the issue is a failed NiMH battery or a corrosion connection. Open the battery compartment, check for rust or damage, and replace the batteries if you can. If there’s visible corrosion, clean the contacts with isopropyl alcohol and a cotton swab.
How tall should my lantern be above the ground?
Hanging lanterns should be positioned so the bottom is at least 6–7 feet off the ground if they’re in a walkway, to avoid bumping heads. For decorative purposes around a patio, 4–5 feet is fine. Pathway stake lanterns should have the light head at about 2 feet above the ground.
Are there any rebates or incentives for solar holiday lighting in California?
Not specifically for decorative holiday lighting. California’s solar incentives primarily apply to permanent photovoltaic systems, not portable consumer lights. However, the energy savings from avoiding wired lights are immediate—solar lanterns cost nothing to operate.
Conclusion
Choosing the right solar lanterns for your California home comes down to matching the technology to your local weather, your home’s aesthetic, and your realistic expectations about winter sun. Start by evaluating your microclimate—coastal fog demands efficient panels, desert heat demands better batteries, and mountain cold demands the right chemistry. Prioritize IP65-rated weatherproofing, warm-light color temperatures, and a battery type you can replace. Follow proper installation practices by aiming panels south and cleaning them regularly. The payoff is a holiday display that runs completely free of electricity costs, year after year, with zero carbon footprint. Make your selection based on the criteria above, and you’ll have a glowing, dependable decor that feels as warm and welcoming as a classic holiday scene. Take the time to read specs carefully, and you’ll find the perfect pieces to make your California home shine this season.