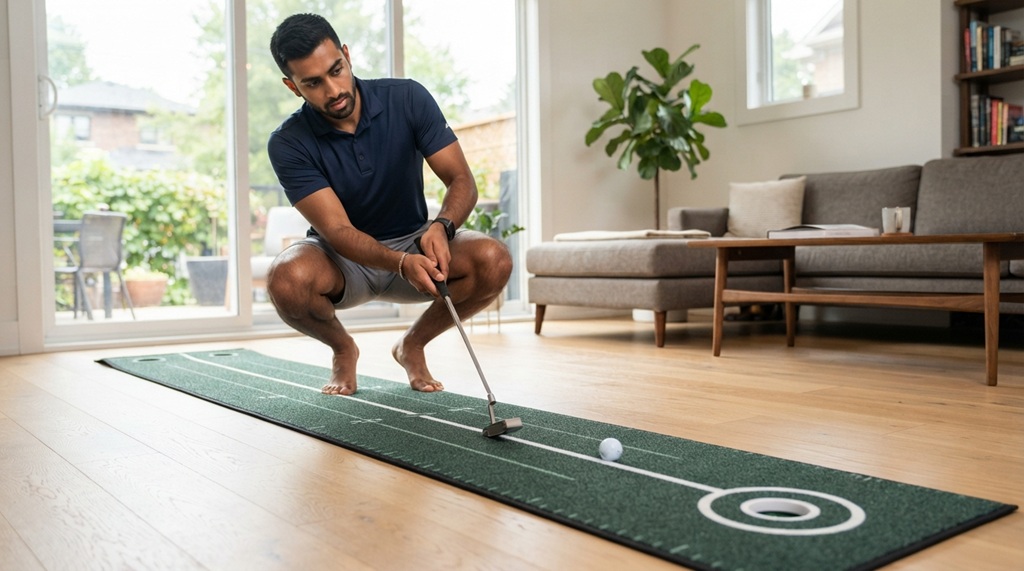
You know the feeling. You’ve just hit a perfect drive, threaded an approach shot to the middle of the green, and then… you three-putt. Again. Putting is the most technical and frustrating part of golf because it requires millimeter precision and repeatable mechanics. When you can’t get to the course, your stroke is the first thing to suffer. Indoor putting mats offer a practical solution, but simply rolling a ball back and forth on a strip of carpet won’t automatically lower your scores. You need a structured approach. This guide explains exactly how to use indoor mats to improve putting accuracy, covering everything from setup and alignment to drills that translate directly to real greens.
Why Indoor Putting Mats Actually Work
Indoor mats are not a replacement for green reading or judging undulation, but they are the single best tool for grooving a consistent stroke. The primary benefit is repetition. On a mat, the surface is flat and the speed is consistent. This removes variables like slope and grain, allowing you to focus exclusively on your mechanics: the path of the putter, the strike point on the face, and your tempo.
Think of it like a basketball player practicing free throws on a regulation court versus a driveway. The driveway doesn’t have the same lines or backboard, but it allows you to repeat the motion. Mats work the same way. They build muscle memory for a straight-back, straight-through stroke. If you can consistently start a ball on your intended line from five feet on a flat mat, you have solved the most critical part of putting: start line. Once you get on the course, you only have to worry about speed and break.
The Difference Between Practice and Mindless Repetition
There is a significant difference between practicing and just hitting balls. Hitting 100 putts without a specific goal or feedback mechanism can actually ingrain bad habits. If your putter face is slightly open at impact, you will subconsciously compensate with your hands to push the ball straight. Over time, this compensation becomes your “normal” stroke, which often breaks down under pressure.
To avoid this, you must use training aids and drills that provide immediate feedback. A mat with alignment lines, a mirror, or a gate (two tees or blocks) forces you to keep the putter face square. Without feedback, you are just guessing. The goal is not to hit the most putts; it is to hit the most putts with a mechanically sound stroke.
Setting Up Your Indoor Putting Station
Before you start drilling, you need to ensure your practice environment is set up correctly. A poor setup will lead to poor mechanics. You cannot simply throw a mat on a slanted floor and expect good results.
Surface and Stability
First, ensure the mat is on a perfectly flat surface. Hardwood floors and concrete are usually fine, but thick carpet can cause the mat to shift or create an uneven lie. If your mat curls at the edges, place a heavy book on the corners for a few hours to flatten it. Stability is crucial. If the mat moves during your stroke, your brain will subconsciously alter your tempo to compensate for the instability.
Eye Position and Alignment
Set up the mat so you are looking directly down the target line. Your eyes should be directly over the ball or just slightly inside the line. A simple way to check this is to hold a ball at your eye level and drop it. If it lands on your putter line, your eyes are in the right spot. Most mats come with a printed line on them. Use this line to align the putter face first, then align your feet, hips, and shoulders parallel to that line. Many amateurs align their feet to the target, which actually sets them right of the target. Use the mat’s grid to ensure your body is parallel, not aimed.
Essential Drills to Improve Putting Accuracy
Now that your station is set, it is time to work. The following drills are designed to target specific weaknesses. Do not rush through them. Quality over quantity is the rule here.
The Gate Drill for a Square Face
This is the most effective drill for improving start line accuracy. Place two tees (or any small objects) just wider than your putter head on the mat, about 3 to 4 feet from the hole or target line. The goal is to stroke the ball through the gate without hitting the tees.
This drill forces you to deliver the putter face square to the target at impact. If your face is open or closed, you will clip a tee. Start with a wider gate and gradually narrow it as you improve. This drill provides instant, undeniable feedback. You cannot fake a square face with a gate in place.
The One-Hand Drill for Path Control
Putting with only your trail hand (right hand for right-handed golfers) helps you feel the clubhead release naturally. Conversely, putting with only your lead hand (left hand) helps you keep the putter moving toward the target without wrist breakdown. Alternate hands for short putts of 3 to 4 feet. This drill highlights which hand is dominating your stroke and causing the putter face to rotate. If you struggle to keep the ball on line with one hand, you have found a weakness to work on.
The Distance Ladder for Speed Control
Accuracy is not just about line; it is also about distance. Place a tee at 3 feet, 5 feet, and 8 feet on the mat. Start at the closest distance. You must make the putt before moving back. Once you make the 3-foot putt, move to 5 feet, then 8 feet. If you miss, you must start over. This drill simulates the pressure of a real round and forces you to dial in your tempo. It is a mental test as much as a physical one.
How to Read the Ball Roll on a Mat
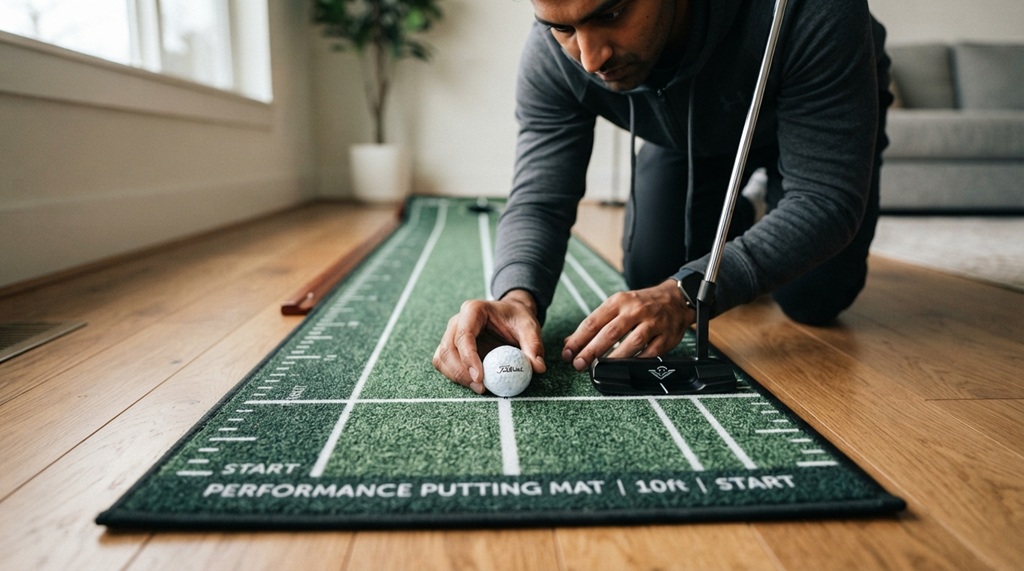
One of the most overlooked aspects of indoor putting is observing the ball’s roll. A ball that skids or hops will not hold its line. You want the ball to have a forward, end-over-end roll as quickly as possible.
Look at the ball immediately after impact. If you see the logo spinning sideways, you have put sidespin on the ball. This usually happens when the putter face is not square at impact or the stroke path is outside-in. On a mat, you can see this spin clearly. A pure putt will have the logo rolling directly end-over-end toward the target with no wobble. If you notice the ball wobbling, slow down your stroke and focus on a solid strike. Hitting the center of the putter face is the first step to a pure roll.
Common Mistakes to Avoid When Using Indoor Mats
Indoor practice is only truly beneficial when executed with disciplined mechanics, as repeating improper fundamentals daily can easily degrade your on-course performance; avoid common pitfalls such as neglecting proper alignment, ignoring distance control on artificial turf, and practicing without a definitive target, and to ensure every aspect of your preparation is dialed in, complement your putting regimen by learning how beginners can choose the right golf tees for better results before transitioning your skills to the outdoor course.
Ignoring the Follow-Through
Many golfers get so focused on the backswing that they stop the putter at impact. On a mat, the ball is gone, so the stroke feels finished. However, a proper putting stroke requires a full, controlled follow-through. The putter should decelerate naturally after the ball is gone. If you stab at the ball, you will lose distance control. Practice making the putter head swing through the impact zone toward the target, holding your finish position until the ball stops rolling.
Practicing Only Short Putts
It is easy to stand at 3 feet and make 50 putts in a row. It feels productive, but it does not improve your distance control. You need to practice lag putting on your mat as well. Even if the mat is only 10 feet long, practice hitting the ball to the very edge of the mat without it rolling off. This teaches you to control the pace with your shoulder swing, not your hands. If you only practice short putts, you will struggle with the 20-foot putts on the course.
Using a Mat That Is Too Fast or Too Slow
Indoor mats vary significantly in speed. Some are designed to mimic fast tournament greens, while others are slower. If your mat is extremely fast, you might develop a very short, jabby stroke. If it is slow, you might develop a long, sweeping stroke. Be aware of your mat’s speed and adjust your expectations. When you get to the course, spend time on the practice green to recalibrate your tempo to the actual green speed.
Building a Practice Routine That Transfers to the Course
To see real improvement, you need a consistent routine. A random 10 minutes here and there is not enough. You should structure your practice like a workout.
Start with 5 minutes of the Gate Drill to dial in your start line. Then, move to 5 minutes of the Distance Ladder to work on tempo. Finally, finish with 5 minutes of “pressure putts” where you must make 5 in a row from 4 feet before you can stop. This routine takes only 15 minutes but covers the three pillars of putting: line, speed, and mental toughness.
Consistency is more important than duration. Practicing 15 minutes every day is far more effective than practicing for two hours once a week. The daily repetition builds the neural pathways needed for automatic, confident strokes. When you step over a putt on the course, you want your body to remember the feeling of a solid, square strike from your indoor practice.
Frequently Asked Questions
How long should I practice on an indoor putting mat each day?
Fifteen to twenty minutes of focused practice is ideal. This is enough time to work on technique without losing concentration. Focus on the quality of each stroke rather than the number of putts hit. A short, focused session daily is more effective than a long, distracted session weekly.
Can an indoor putting mat help with reading greens?
No. Indoor mats are flat and do not have break or slope. They are designed to improve your stroke mechanics and start line. Green reading is a separate skill that requires looking at the contours of the actual green. Use the mat to ensure you can start the ball on your chosen line, and use the course to practice choosing the right line.
Is it better to practice with a ball marker or a hole on the mat?
It depends on your focus. A hole gives you a target and helps with distance control. A ball marker (like a coin or a small dot) forces you to focus on rolling the ball over a specific point, which is excellent for line accuracy. Using both is ideal. Use the hole for distance drills and the marker for alignment drills.
Should I use my regular golf ball on an indoor mat?
Yes, you should always use a real golf ball. Practice balls are lighter and do not roll the same as a standard ball. Using a real ball gives you accurate feedback on the roll and sound at impact. The sound of a solid strike is an important auditory cue that helps build confidence.
How do I know if my putter face is square at impact?
The Gate Drill is the best way to check. If you can hit putts through a narrow gate without touching the tees, your face is square. Another method is to use a piece of tape on the face of the putter. If you strike the ball in the center of the tape consistently, your face is stable. If you are hitting the heel or toe, your path is off.
Conclusion
Improving your putting accuracy does not require expensive technology or hours at the course. A simple indoor mat, combined with a structured routine and specific drills, can transform your stroke. Focus on the fundamentals: a square face, a consistent path, and controlled tempo. Use the Gate Drill to eliminate misses, the Distance Ladder to refine speed, and consistent daily practice to build confidence. By committing to these focused practice sessions, you will see a noticeable difference in your ability to start the ball on your intended line and make more putts when it matters most.