A rescue group coordinator once told me that 80% of the dog seat belts she sees during transport inspections are installed wrong — too loose, attached to collars instead of harnesses, or connected to non-structural parts of the vehicle that would fail instantly in an accident. These owners spent money on safety equipment and genuinely believe their dogs are protected, but incorrect installation makes even a $60 crash-tested dog seat belt attachment about as useful as a decorative ribbon. The good news: proper installation takes under 3 minutes once you know the correct sequence. A correctly installed dog seat belt connects a crash-rated harness to your vehicle’s built-in restraint system through a length-adjustable tether, creating a secure dog travel system that limits dangerous forward movement while allowing comfortable repositioning during drives. This guide walks through the exact installation process step-by-step, covers the most common mistakes that compromise safety, and shows you how to verify your setup is genuinely protective rather than just cosmetically correct.
What Equipment Do You Need Before Installing a Dog Seat Belt?
You need three components for proper installation: a crash-tested dog travel harness with a reinforced back D-ring, a seat belt tether with locking vehicle-end attachment, and access to your vehicle’s rear seat belt buckle or LATCH anchor system.
Component checklist:
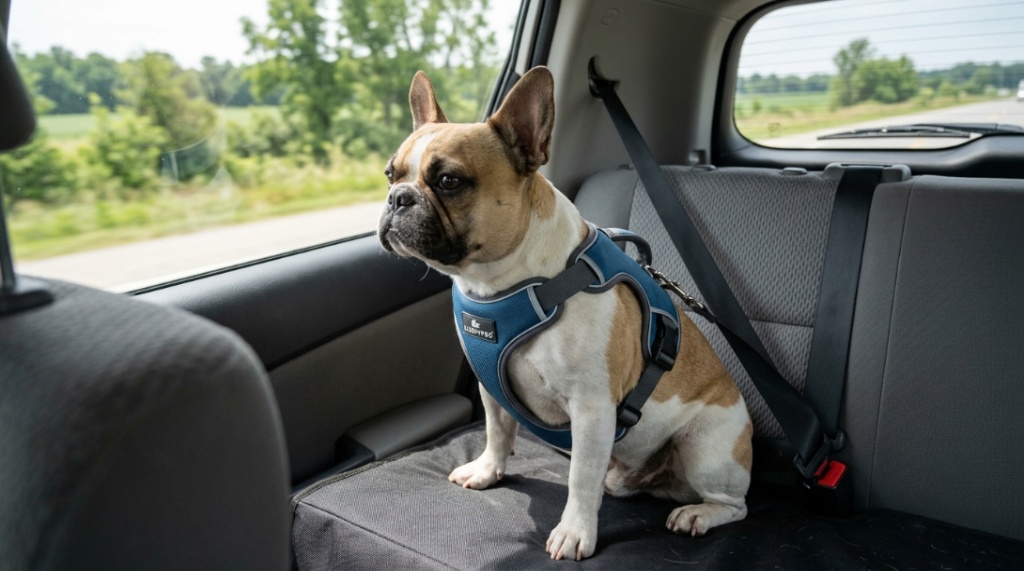
- Dog travel harness (NOT a walking harness): Must have a reinforced dorsal (back) D-ring specifically rated for crash forces. Walking harnesses have front D-rings that can flip your dog during sudden stops. The harness should fit snugly with only 2 fingers fitting between straps and body.
- Seat belt tether: Adjustable-length strap (typically 16–30 inches) with a locking carabiner or snap hook on the dog end and a seat belt tongue plate or locking clip on the vehicle end.
- Vehicle attachment point: Rear seat belt buckle (preferred) or LATCH anchor (acceptable). Never use headrest posts, grab handles, or cargo hooks.
Optional but recommended:
- Seat belt lock clip (prevents the seat belt from extending during use)
- Seat protector (prevents harness hardware from damaging upholstery)
- Non-slip seat pad (prevents your dog from sliding on leather/vinyl seats)
Verify all components are compatible before beginning installation. The tether’s vehicle-end attachment must fit your specific seat belt buckle model, and the dog-end clip must fit your harness D-ring without excessive play.
How Do You Install a Dog Seat Belt Step by Step?
Installation follows five steps: position the dog in the rear seat, fit the harness correctly, route the tether from harness to seat belt buckle, adjust length for limited movement, and verify security with a pull test — total time under 3 minutes.
Step 1: Position your dog in the rear seat (30 seconds)
- Always use the rear seat — never the front (airbag danger)
- Center position is safest (farthest from side impacts) but outboard positions work with proper restraint
- Place a non-slip pad or seat cover if using leather/vinyl seats
- Let your dog settle into a comfortable sitting or lying position
Step 2: Fit the harness properly (60 seconds)
- Slide the harness over your dog’s head and secure chest and belly straps
- Adjust all straps until snug — you should fit exactly 2 fingers between any strap and your dog’s body
- Verify the back D-ring sits between the shoulder blades (not on the neck or lower back)
- Check that no straps are twisted, folded, or rubbing against armpits
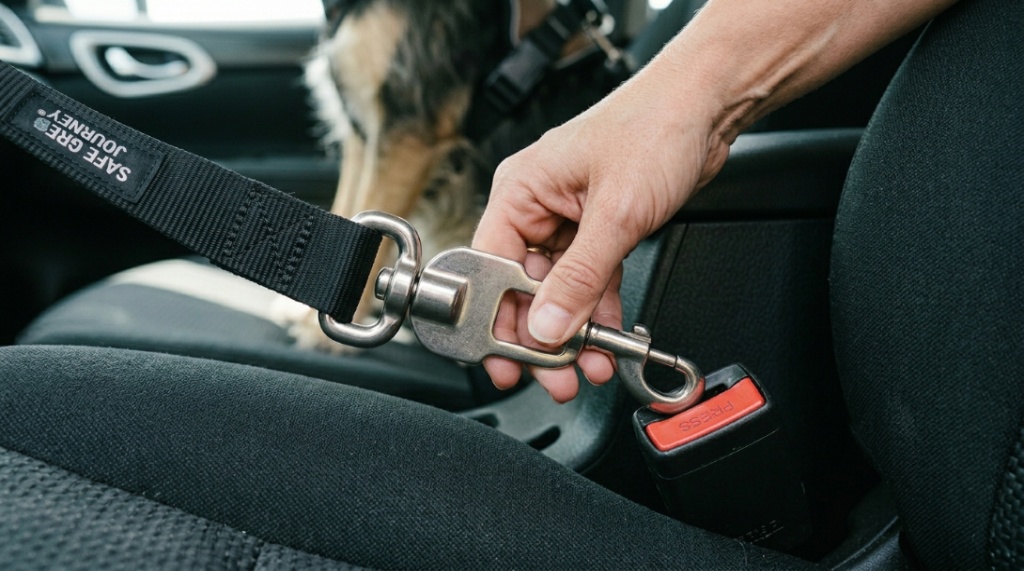
Step 3: Connect tether to vehicle (30 seconds)
- Insert the tether’s tongue plate into the seat belt buckle until you hear a firm click
- Tug firmly to verify it is locked — it should not release under downward or forward force
- If using a LATCH anchor: clip the tether’s hook directly to the exposed LATCH bar
- If using a seat belt lock clip: route the seat belt through the clip to prevent extension
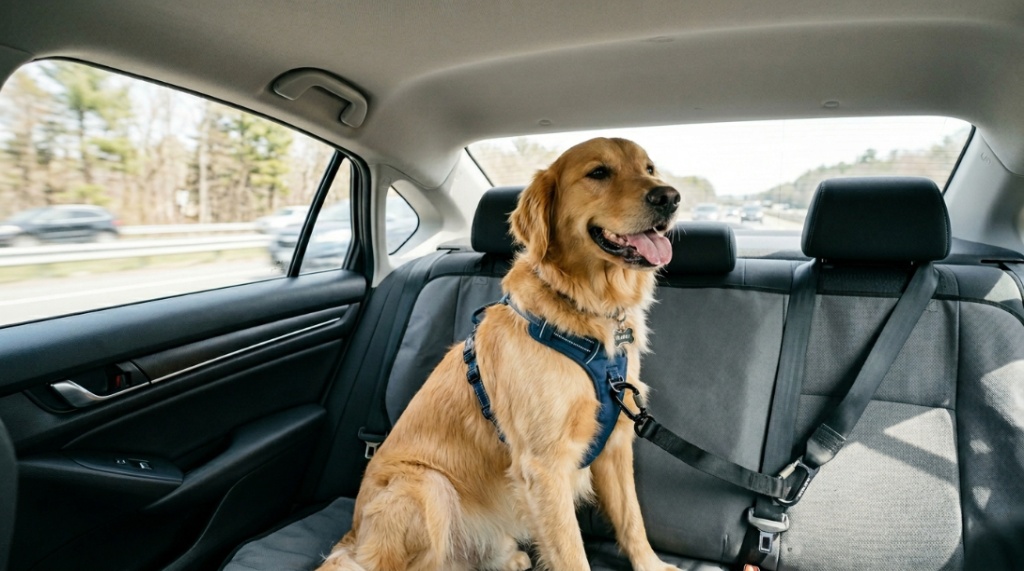
Step 4: Attach tether to harness and adjust length (30 seconds)
- Clip the tether’s carabiner or snap hook to the harness back D-ring
- Verify the gate closes completely and locks (if locking carabiner)
- Adjust tether length: your dog should be able to sit, lie down, and turn around — but NOT reach the front seats, windows, or floor
- Ideal length allows 6–12 inches of slack when sitting normally
Step 5: Verify installation with pull test (30 seconds)
- Gently pull the tether forward with moderate force — it should hold firmly at the buckle
- Pull the harness attachment point — the carabiner should not slip or open
- Ask your dog to move naturally — observe whether the tether restricts comfort positions or allows dangerous reach
- Have someone apply moderate pressure to the harness from the front — simulating a sudden stop. The system should hold without any component releasing.
What Is the Correct Tether Length for a Dog Seat Belt?
The correct tether length allows your dog to sit upright, lie down, and turn 180 degrees comfortably while preventing their head from reaching any window, the front seat backs, or the vehicle floor — typically 18–24 inches for medium dogs, adjusted up or down based on dog size and vehicle dimensions.
Length guidelines by situation:
| Dog Size | Recommended Length | Allows | Prevents |
|---|---|---|---|
| Small (under 25 lbs) | 14–20 inches | Sitting, lying, turning on seat | Falling off seat edge, reaching windows |
| Medium (25–60 lbs) | 18–24 inches | All comfort positions, limited standing | Reaching front seats, climbing, window access |
| Large (60–100 lbs) | 20–28 inches | Sitting, lying, repositioning | Standing fully (which shifts center of gravity dangerously), front seat access |
| Giant (100+ lbs) | 24–30 inches | Lying flat, sitting, limited movement | Climbing over seats, window projection |
The critical test: with your dog sitting normally, there should be 6–12 inches of slack in the tether. When they stand or move forward, the tether should engage and prevent further forward movement BEFORE their head could contact the front seat back. If they can reach the window, the tether is too long.
What Are the Most Common Installation Mistakes?
The five most common installation mistakes are: attaching to a collar instead of a harness, using excessive tether length, connecting to non-structural vehicle points, failing to lock the seat belt mechanism, and using a walking harness with a front D-ring rather than a travel harness with a back D-ring.
Each mistake and its consequence:
- Collar attachment: Concentrates all crash force on the neck. Can cause tracheal collapse, cervical fracture, or strangulation. NEVER attach a seat belt to a collar under any circumstances.
- Excessive length: Allows too much forward projection during sudden stops. Your dog builds momentum over the extra distance, increasing impact force when the tether finally catches. More length = more danger, not more comfort.
- Non-structural attachment: Headrests, grab handles, and cargo hooks are not designed for crash forces. They can detach, bend, or break — converting a restrained dog into an unrestrained projectile mid-accident.
- Unlocked seat belt: If the seat belt retracts freely (as designed for human use), it allows dangerous forward extension during sudden stops before the locking mechanism engages. Use a lock clip to prevent this.
- Front D-ring attachment: Walking harnesses with front clips can rotate your dog violently during sudden stops, twisting the spine and potentially causing the dog to flip. Travel harnesses with dorsal (back) D-rings prevent rotation.
How Do You Verify Your Installation Is Actually Safe?
Verify installation safety through three tests: a static pull test (firm forward pressure on all connection points), a dynamic brake test (gentle hard brake in a parking lot at 5 mph), and a visual comfort check (confirming no rubbing, twisting, or restricted breathing during normal movement).
Verification protocol:
Test 1: Static pull test (before driving)
- Pull each connection point with 20–30 lbs of force (firm tug, not your full strength)
- Check: buckle holds, carabiner stays closed, harness D-ring does not deform, tether does not slip through adjuster
- Any failure = do not drive until resolved
Test 2: Dynamic brake test (parking lot, 5 mph)
- Drive to 5 mph in an empty parking lot and brake firmly (not emergency stop)
- Observe: how far forward does your dog move? Does the tether catch before dangerous distance? Does the harness stay positioned correctly?
- Adjust tether length based on observations
Test 3: Comfort verification (10-minute drive)
- Drive normally for 10 minutes observing your dog
- Check for: strap rubbing (red marks on skin), restricted breathing (panting more than usual), inability to reach comfortable positions, signs of stress from restriction
- Adjust harness fit or tether length to address any comfort issues without compromising safety
Repeat these tests after every harness adjustment, with new equipment, or in a different vehicle. Installation that works in your sedan may need modification in your SUV due to different seat heights and belt angles.
Can You Install a Dog Seat Belt in Any Vehicle?
Dog seat belts can be installed in any vehicle with standard seat belt buckles or LATCH anchors — this covers virtually all passenger vehicles manufactured after 2002, though specific installation details vary by vehicle type and seat configuration.
Vehicle-specific considerations:
- Sedans: Straightforward rear seat installation. Center seat belt often uses a different buckle type — verify tether compatibility. Outboard positions usually easier.
- SUVs/Crossovers: Higher seat position means different tether angle. May need slightly longer tether to account for seat-to-floor distance. Second-row captain’s chairs may have limited belt access.
- Trucks (crew cab): Rear seats often smaller with less legroom. Verify your dog fits comfortably before installing restraint. Some trucks have fold-up rear seats that change belt geometry.
- Minivans: Multiple row options. Second row is optimal — third row puts your dog too far from driver supervision and airflow.
- Two-seat vehicles: Front seat only option. Disable passenger airbag, use a crash-tested crate if possible, or install with maximum tether restriction to keep dog low and away from airbag deployment zone.
For specific product recommendations that work across various vehicle types, the best dog seat belt systems reviewed for different vehicles provides compatibility information and installation tips for specific vehicle categories — ensuring your chosen product works with your specific car.
Conclusion
Installing a dog seat belt correctly takes under 3 minutes and requires attention to five critical steps: rear seat positioning, proper harness fit with a back D-ring, secure vehicle attachment to the seat belt buckle, appropriate tether length adjustment, and verification through pull and brake tests. The most common mistakes — collar attachment, excessive length, wrong harness type — are all easily avoided once you understand why each step matters.
A properly installed dog seat belt transforms from a passive strap into an active safety system that protects your dog during sudden stops and collisions while allowing comfortable travel. Take the extra 30 seconds to verify your installation before every drive. The one time it matters — the unexpected hard brake, the unavoidable collision — you will not have a chance to fix a loose buckle or adjust a too-long tether. Get it right before you turn the key.
How long did your first dog seat belt installation take — and what mistake did you catch during testing? Share your experience to help new pet parents get it right the first time.
Keeping your dog securely buckled up doesn’t just protect them during sudden stops; it also keeps them from pacing around the cabin, which can drastically reduce travel anxiety. If your pup’s nervousness translates into loud vocalizations during the drive, check out our guide on Dog Barking and How to Fix It to help calm them down and ensure a peaceful, quiet ride for everyone.
Frequently Asked Questions
Can I use the same dog seat belt in multiple vehicles?
Yes — most dog seat belts use universal seat belt buckle attachments that fit any standard vehicle. However, you may need to adjust tether length when switching between vehicles due to different seat heights, seat belt angles, and interior dimensions. Always perform a quick verification test when using the seat belt in a different vehicle for the first time.
How tight should the tether be when my dog is sitting?
When your dog sits normally, the tether should have 6–12 inches of slack — enough to allow natural head movement and repositioning, but not so much that they can stand fully or reach windows. The tether should engage (become taut) before your dog’s head could reach the front seat back during a sudden stop.
Do I need to remove the dog seat belt when my dog is not in the car?
No — most seat belt tethers can remain connected to the vehicle buckle when not in use. Simply tuck the loose tether under the seat or coil it on the seat to prevent tangling. This saves installation time on your next trip. However, check that it does not interfere with passenger seat belt access or create a trip hazard when loading the vehicle.
Can two dogs share one seat belt attachment point?
Never. Each dog requires their own independent seat belt connection to their own seat belt buckle. Sharing creates entanglement risk, distributes crash forces unpredictably, and allows dogs to interfere with each other’s restraint. If you travel with two dogs, use two separate rear seat belt buckles — one for each dog.
My dog chews the tether — how do I prevent this?
Use a chew-resistant tether with steel cable core covered in nylon. Apply bitter-tasting deterrent spray to the tether surface. Ensure your dog is not chewing due to anxiety (address the underlying stress). If chewing persists, a crash-tested crate eliminates tether access entirely while providing superior protection.
How do I install a dog seat belt with a seat that has no traditional buckle?
Some vehicle seats use integrated (built-in) seat belts without separate buckles. In this case, use a LATCH anchor adapter (clips directly to the vehicle’s LATCH system), a seat belt lock clip that wraps around the existing belt webbing, or a universal mounting bracket designed for integrated belt systems. Consult your vehicle manual for LATCH anchor locations.
Should I install the seat belt on the driver side or passenger side rear seat?
The center rear seat is statistically safest (farthest from all impact zones). If center is unavailable, the passenger side rear seat is preferred because it positions your dog away from traffic during roadside stops. The driver side works but places your dog closer to oncoming traffic during curbside loading. Choose based on your typical parking and loading situations.