
You want a creamy, barista-quality latte at home, but you don’t own a fancy espresso machine with a steam wand. Maybe the thought of spending hundreds of dollars on a separate milk frother makes you wince. The good news is that you are not stuck with watery, flat coffee. You can create thick, stable latte foam without expensive gear using items you likely already have in your kitchen. This guide will show you exactly how to achieve that silky microfoam using a Mason jar, a French press, a whisk, or even a blender. We will break down the science, the technique, and the simple tools needed so you can enjoy café-quality lattes every morning without breaking the bank.
What Exactly Is Milk Foam and Why Does It Matter?
The Science of Air and Fat
Milk foam is simply air bubbles trapped in the milk’s protein structure. When you heat and agitate milk, the proteins (casein and whey) unfold and create a network that holds those tiny air bubbles. The fat content of the milk directly impacts the texture. Whole milk creates a richer, creamier foam because the fat molecules stabilize the bubbles. Skim milk creates a larger, stiffer foam that is more like a foam topping than the silky microfoam you want for a latte.
Why Texture Beats Taste (Sometimes)
A flat latte tastes fine, but a foamy latte feels luxurious. The texture changes how the drink coats your mouth and how the flavors interact. Good foam integrates the espresso and milk, creating a unified taste rather than a layer of hot milk and a separate layer of coffee. Without good foam, your latte is just coffee with milk. With good foam, it is a crafted beverage.
Temperature Is Non-Negotiable
Regardless of the tool you use, you must heat your milk to the correct temperature range: 150°F to 160°F (65°C to 70°C). Below this range, the proteins won’t fully unwind to trap air. Above 170°F (76°C), the proteins denature completely and cannot hold foam. The milk will scorch, and the foam will collapse. A simple kitchen thermometer is your best friend here.
Which Kitchen Tools Can Create Latte Foam?
The Classic Mason Jar Method
This is the most accessible method. Fill a clean Mason jar (a pint or quart size works) with cold milk, filling it only halfway to allow room for expansion. Screw the lid on tightly. Shake the jar vigorously for 30 to 45 seconds until the milk doubles in volume and looks bubbly. Remove the lid and microwave the jar for 30 to 60 seconds. The heat stabilizes the foam. Watch carefully to avoid overflow. Spoon the foam onto your coffee.
The French Press Technique
A French press is not just for coffee grounds; it is a fantastic frother. Pour cold milk into the press, filling it only to the halfway point. Insert the plunger but do not press down. Microwave the press (without the metal lid) for about 30 seconds to warm the milk. Then, pump the plunger up and down rapidly for 30 to 60 seconds. The mesh screen pushes air into the milk, creating a surprisingly fine foam. This method yields a denser, more consistent foam than the jar method.
The Immersion Blender Hack
If you own a stick blender (immersion blender), you have a powerful frothing tool. Heat your milk in a tall, narrow container (like a measuring cup) to 150°F. Place the blender head just below the surface of the milk and turn it on. Tilt the blender slightly to create a vortex. Within 15 to 30 seconds, you will have a thick layer of microfoam. This is the fastest manual method and produces foam very close to a steam wand.
How Does a French Press Compare to a Jar for Frothing?
Foam Quality and Density
The French press produces a significantly denser and finer foam than the Mason jar. The mesh filter creates thousands of tiny bubbles, while the jar creates larger, more uneven bubbles. For a latte, the French press is the clear winner because the smaller bubbles integrate better with the espresso, creating a smoother mouthfeel.
Ease of Use and Cleanup
The jar is easier to clean (just rinse and shake with soapy water). The French press requires you to wash the mesh plunger, which can trap milk residue. However, the jar method requires more physical effort (shaking hard for 45 seconds). The French press is less physically demanding because you just pump the plunger.
Consistency and Control
With the French press, you have more control over the texture. If you want more foam, pump faster. If you want larger bubbles, pump slowly. The jar is an all-or-nothing affair. You shake until your arms are tired, and you hope for the best. The French press gives you a repeatable process that you can dial in.
Can You Use a Blender for Latte Foam?
Countertop Blender vs. Immersion Blender
A standard countertop blender can create foam, but it often creates too much foam too fast, leading to a frothy mess that spills over. The blade action introduces massive amounts of air, which can result in very large bubbles that pop quickly. An immersion blender is superior because you control how much air enters the milk by adjusting the depth of the blade.
How to Use a Standard Blender
If you only have a standard blender, use caution. Heat your milk first. Pour it into the blender, filling it only one-quarter full. Pulse for 5 to 10 seconds on low speed. Do not run it continuously. Stop immediately when you see the milk double in volume. Pour the foam carefully into your cup. This method works but is less reliable than the immersion blender or French press.
Why Cold Milk Works Better in a Blender
Cold milk traps air bubbles more effectively than warm milk during the initial blending. The cold temperature keeps the proteins rigid, allowing them to capture more air. Once foamed, you can microwave the milk to stabilize the foam and bring it to the correct serving temperature. This two-step process (blend cold, heat in microwave) often yields the best results with a standard blender.
What Type of Milk Creates the Best Foam at Home?
Whole Milk (3.25% Fat)
Whole milk is the gold standard for latte foam. Its balanced fat and protein content creates a smooth, velvety microfoam that is stable and sweet. It is the most forgiving milk for manual frothing methods because it doesn’t require perfect technique to produce decent results.
Skim and 1% Milk
Skim milk produces a lot of foam, but it is dry, stiff, and resembles soap suds more than latte foam. It collapses quickly and doesn’t blend well into espresso. If you are counting calories, use 1% or 2% milk. It will produce a thinner foam than whole milk, but it is still quite usable. Homogenized 2% milk is a good compromise.
Plant-Based Milks and the Protein Problem
Barista blends of oat milk and almond milk are specifically designed for frothing. Regular oat or almond milk lacks the protein structure to hold stable foam. If you are using plant-based milk, look for a product labeled “barista edition.” These contain added vegetable oils and stabilizers (like gellan gum) that mimic the foam-holding capacity of dairy milk. Oat milk is generally the most successful plant-based option for home frothing.
How to Achieve Microfoam Without a Steam Wand
The Manual Whisk Method
Yes, you can use a simple wire whisk. Heat your milk in a saucepan until it is steaming hot (150°F). Pour it into a bowl. Whisk vigorously in a back-and-forth motion, not in circles. The goal is to incorporate air by breaking the surface tension. This takes about 2 to 3 minutes of continuous whisking. It is a great arm workout, but it produces a thin, watery foam compared to other methods.
The Battery-Operated Milk Frother
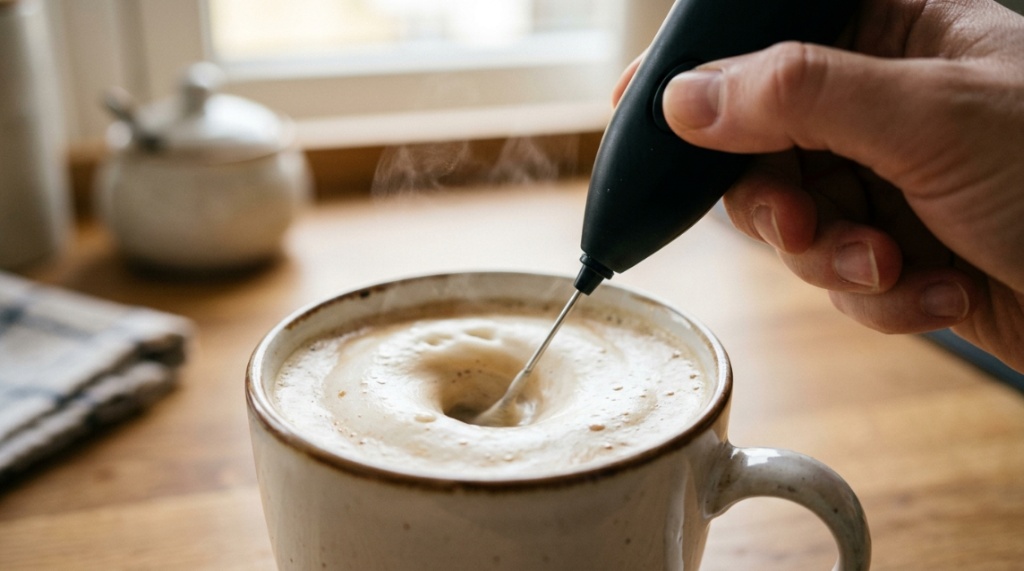
These cheap devices (often costing less than $20) are widely available. They consist of a small motor with a whisking attachment. Heat your milk in a mug, then submerge the frother and turn it on. Move it in an up-and-down motion for 20 seconds. This creates a large, bubbly foam that separates quickly. It is good for cappuccinos with a thick foam cap, but not ideal for the silky microfoam needed for latte art. For a more reliable tool, you can explore options that combine affordability and quality when you search for latte foam without expensive gear.
The “Dry Shake” Trick
This is a little-known method used by some home baristas. Heat your milk to 150°F. Pour it into a travel mug or any container with a tight-fitting lid. Add a small scoop of powdered milk or a few drops of vanilla extract (the alcohol and sugar help stabilize the foam). Shake the container for 20 seconds. The added powdered milk increases the protein content, resulting in a much thicker and longer-lasting foam. This trick works especially well with low-fat milk.
Which Method Works Best for Different Types of Coffee Drinks?
For a Latte (Silky Microfoam)
Immersion blender or French press. These methods create the smallest bubbles, which integrate with the espresso for a smooth, unified texture. The coffee and milk should blend into a single, creamy liquid. The foam should be so fine that you barely notice the texture change between the liquid and the top layer.
For a Cappuccino (Thick Foam Cap)
Mason jar or battery-operated frother. These methods create a large, stiff foam that sits on top of the espresso like a cloud. You want distinct layers: liquid espresso, liquid milk, and a thick foam cap. The foam should be fluffy and dry enough to hold a spoonful of cocoa powder.
For a Flat White (Very Thin Microfoam)
French press only. The flat white requires an extremely thin layer of microfoam that is almost like wet paint. You need to pump the French press slowly and deliberately at the end to break down any large bubbles. The final result should be glossy and pour like liquid, not sit on top of the coffee. If you love crafting cafe-style drinks at home, you might also enjoy exploring how Japanese Flavor Trends Taking Over Restaurant Menus in Miami, FL are redefining modern culinary pairings!
What Common Mistakes Ruin Homemade Foam?
Heating the Milk Too High
This is the number one mistake. Milk proteins denature at high temperatures. If your milk reaches a boil, the foam will instantly collapse. You will be left with hot milk and a thin, watery layer. Always use a thermometer. If you don’t have one, the milk is ready when it is too hot to touch but not yet simmering.
Using Cold Milk with a Jar or French Press
While cold milk is good for blenders, it is bad for the jar or French press method. Cold milk resists trapping air because the fat globules are solid and less flexible. Always warm the milk slightly (to room temperature or just warm to the touch) before shaking or pumping. This makes the fat flexible and the proteins more reactive.
Over-Shaking or Over-Pumping
There is a limit to how much air you can force into milk. If you shake a jar for more than 60 seconds, you will break down the foam structure. The proteins become overstretched and can’t hold the bubbles. Pumping a French press too fast also creates large, unstable bubbles. Stop when the milk has doubled in volume. More effort does not equal better foam.
How to Fix Flat Foam or Failed Frothing Attempts
When Your Foam Collapses Instantly
This usually means your milk was too hot or too cold. If it was too hot, you cannot re-foam it—the proteins are already destroyed. If it was too cold, simply reheat the milk gently (do not boil) and try again with a fresh batch of milk. You cannot rescue destroyed foam; you must start over with new milk.
When Your Foam Is Too Dry and Bubbly
You have introduced too much air and not enough agitation. Pour the foam back into the container and use a whisk or your French press plunger to gently stir the foam without introducing new air. This process, called “grooming” the foam, breaks down the large bubbles into smaller ones. Grooming can salvage an otherwise decent batch of foam.
When Your Foam Won’t Hold at All
Check your milk fat content. If you are using skim milk, it will always struggle to hold foam compared to whole milk. Also, check the freshness of the milk. Older milk (closer to its expiration date) has denatured proteins and will not foam well. Fresh milk is critical for good foam stability.
Is It Worth Buying a Cheap Electric Frother?
The Pros of a $15–$25 Frother
They are fast (15 seconds), require no arm strength, and are easy to clean (just rinse the whisk). They are perfect if you only make one latte per day and you don’t want to mess with jars or plungers. The foam is consistent, though it tends to be thick and bubbly rather than silky. For most home users, this is a worthwhile upgrade from manual methods.
The Cons of a Cheap Frother
They often fail within six months of regular use. The motor can burn out, or the battery contacts can corrode. They also cannot create microfoam; the foam they produce is better suited for hot chocolate or a simple cappuccino than a proper latte. If you want the finest texture, you must go with a French press or immersion blender.
When to Upgrade to a Manual Tool Instead
If you find yourself frustrated by the battery life or the bubble size of a cheap electronic frother, switch to a French press. A good-quality French press (costing around $20–$30) will last for years. It requires a bit more effort, but it delivers superior foam quality. It is a classic tool for a reason, and it doubles as a coffee brewer.
Frequently Asked Questions
Can I use a protein shaker bottle to make foam?
Yes, a protein shaker with a metal whisk ball works just like a Mason jar. Fill it halfway with warm milk, close the lid tightly, and shake vigorously for 30 seconds. Remove the whisk ball before microwaving. The result is similar to the jar method, producing decent but not micro-fine foam.
Does the temperature of the coffee cup matter?
Absolutely. A cold cup will immediately steal heat from your milk, causing the foam to deflate. Always warm your cup by rinsing it with hot water or placing it on a coffee mug warmer. A warm cup preserves the foam structure and keeps your latte hot longer.
Why does my oat milk curdle when I froth it?
Oat milk curdles when it encounters acidity (from the coffee) or excessive heat. Use a barista blend oat milk that is formulated to handle high heat and acidity. Also, ensure you add the milk to the coffee slowly, not all at once, to prevent shocking the proteins.
Can I re-use leftover milk foam?
No. Once foam has collapsed, the milk proteins are denatured. You cannot re-froth it. Leftover milk that was heated and frothed should be discarded. It will not foam again and may have a cooked flavor.
How long should I microwave milk for frothing?
A standard mug of cold milk (8 ounces) takes about 45 seconds to 1 minute in a 1000-watt microwave. Stir the milk halfway through to avoid hot spots. The final temperature should be 150°F. If the milk is bubbling in the microwave, it is too hot and the foam will collapse.
Is it possible to make foam without heating the milk?
Yes, you can make cold foam. Pour cold milk into a jar or use an immersion blender. The foam will be thick but will separate quickly when poured into hot coffee. Cold foam is best for iced lattes or cold brew. It requires no heating, but it is less stable than hot foam.